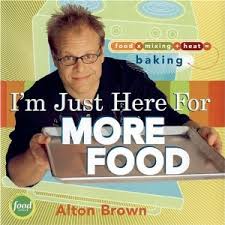
One last muffin method recipe (for now) from I'm Just Here for More Food.
I made these two weekends ago for a hurried pre-church breakfast. On the plus side, they are made with 100% whole wheat flour (you don't have to mix in white flour like with most recipes) so they are on the "healthier" side for pancakes. On the minus side, they are kind of "healthy" tasting unless you load them up with syrup, etc.
Again, everything goes in the food processor to make (ostensibly) lighter pancakes:
The liquid ingredients- eggs, buttermilk (which will *hopefully* be featured in the 1st biscuit method recipe soon) and melted butter.
We don't have an electric griddle (#1 recommended method of cooking pancakes) or a griddle (#2 recommended method), but we do have a big sautee pan and a lopsided burner (#13 recommended method). I made them too big; they didn't cook evenly; I burned two. None of these things were the recipe's fault, but it definitely made me less excited about it than other things I've made.
Out of the whole batch, a few of them turned out pretty well.
Just add syrup and a mad scramble to get to church in time, and you have breakfast from two weeks ago.
Showing posts with label MS in Baking Project. Show all posts
Wednesday, August 11, 2010
Getting an MS in Baking- Whole Wheat Pancakes
Posted by
Chelsea
at
5:41 AM
Getting an MS in Baking- Whole Wheat Pancakes
2010-08-11T05:41:00-05:00
Chelsea
Baking|MS in Baking Project|
Comments
Labels:
Baking,
MS in Baking Project
Wednesday, July 7, 2010
Getting an MS in Baking- Dutch Baby
Cooking through these recipes, it is not hard to understand how the before picture in this article happened:
Butter. Lots of butter. Too much butter. You don't want to know how much.
Anyway, this is another muffin method recipe. It was different from the ones I'd made before in that the batter came together very loosely.
I'm not sure exactly why this was a muffin method recipe except- I guess- that you don't beat the batter into submission with a stand mixer.
Note to my cardiologist- stop reading here.
Those are pieces of bacon in the batter. The batter goes into a skillet filled with melted butter.
And into the oven for 20 minutes. Except that after 20 min there was still a lot of liquid on the top. We let it cook some more and finally decided to pour off the extra liquid (aka butter juice) and eat it as it was.
Here's half of it. You can see it started to puff up on the outside- it's supposed to be like a popover, but it got bogged down in the middle and couldn't pop up correctly. I don't think I made a mistake following the recipe. It still tasted really really good- especially with the maple syrup we brought back from Canada- but no poof. I guess I can look online to see if I can find a correction to the recipe. Otherwise "way less butter" will be my first liner note in the cookbook.
Butter. Lots of butter. Too much butter. You don't want to know how much.
Anyway, this is another muffin method recipe. It was different from the ones I'd made before in that the batter came together very loosely.
I'm not sure exactly why this was a muffin method recipe except- I guess- that you don't beat the batter into submission with a stand mixer.
Note to my cardiologist- stop reading here.
Those are pieces of bacon in the batter. The batter goes into a skillet filled with melted butter.
And into the oven for 20 minutes. Except that after 20 min there was still a lot of liquid on the top. We let it cook some more and finally decided to pour off the extra liquid (aka butter juice) and eat it as it was.
Here's half of it. You can see it started to puff up on the outside- it's supposed to be like a popover, but it got bogged down in the middle and couldn't pop up correctly. I don't think I made a mistake following the recipe. It still tasted really really good- especially with the maple syrup we brought back from Canada- but no poof. I guess I can look online to see if I can find a correction to the recipe. Otherwise "way less butter" will be my first liner note in the cookbook.
Posted by
Chelsea
at
5:07 AM
Getting an MS in Baking- Dutch Baby
2010-07-07T05:07:00-05:00
Chelsea
Baking|MS in Baking Project|
Comments
Labels:
Baking,
MS in Baking Project
Saturday, June 19, 2010
Getting an MS in Baking- Pineapple Upside Down Cake
When is a cake a muffin? When it's pineapple upside down cake. Why? Because unlike, say, birthday cake, the cake part of pineapple upside down cake is supposed to be kind of course. In the book, Brown says that pineapple UDC is probably a descendant of cornbread, which is also made using the muffin method.
The bottom/top comes together first. Melt some (okay, a lot of) butter and stir in brown sugar.
Top with pineapple and marachino cherries, then sprinkle with nuts.
Then the actual muffin technique comes in. Mix together the wet and dry ingredients (which have been weighed and sifted in the food processor, of course) until just incorporated. I don't think I mentioned this before, but Brown recommends using a whisk for this part and walking away about 10 stirs before you think you should.
Here's the cake after 40 minutes in the oven. Golden brown and bubbly.
And after it's been "right side upped". I like this cake because it's easy but has a nice presentation, and it's different from other deserts that usually end up at picnics (which is where this one is destined).
This picture looks a little bit like it came out of the Gallery of Regrettable Food, but I can assure you it looks delicous IRL.
The bottom/top comes together first. Melt some (okay, a lot of) butter and stir in brown sugar.
Top with pineapple and marachino cherries, then sprinkle with nuts.
Then the actual muffin technique comes in. Mix together the wet and dry ingredients (which have been weighed and sifted in the food processor, of course) until just incorporated. I don't think I mentioned this before, but Brown recommends using a whisk for this part and walking away about 10 stirs before you think you should.
Here's the cake after 40 minutes in the oven. Golden brown and bubbly.
And after it's been "right side upped". I like this cake because it's easy but has a nice presentation, and it's different from other deserts that usually end up at picnics (which is where this one is destined).
This picture looks a little bit like it came out of the Gallery of Regrettable Food, but I can assure you it looks delicous IRL.
Posted by
Chelsea
at
5:51 AM
Getting an MS in Baking- Pineapple Upside Down Cake
2010-06-19T05:51:00-05:00
Chelsea
Baking|MS in Baking Project|
Comments
Labels:
Baking,
MS in Baking Project
Tuesday, June 15, 2010
Getting an MS in Baking- Chocolate Chip Cookie #10
This is the second in a series of posts about baking through Alton Brown's (the Good Eats guy) I'm Just Here for More Food. See the first one here.
Next the liquid ingredients come together. Here's one of my ice cube egg yolks. I think this would work better if I had more forethought and let it defrost in the fridge during the day rather than delicately trying to defrost it in the microwave and not get scrambled eggs.
Here are the liquids together: You can see tiny bits of cooked egg yolk that had to be scooped out.
Then the liquids are poured into the dry ingredients and the two are brought together with a minimal amount of stirring. Why? Because stirring distributes air bubbles evenly throughout the baked good, making it softer and more tender. That's why you beat the heck out of the batter for a cake. It makes it nice and delicate and soft. Muffins, however, are not supposed to be too delicate. Doing just a little stirring causes irregular air bubbles, leading to a more course texture. Although most cookies are made using the creaming method, these are muffin method cookies.
Here's the batter together. It's not nice and smooth like the slice n' bakes.
In fact, the batter was very loose, and I had to ball it together with my hands. The result, however, was amazing. I got a lot of compliments on these cookies.
This book is the source of the information contained in this post.
Marathon Maiden asked a great question in the comments on my first MS in baking post: If everything gets mixed together eventually, why worry about doing the dry and liquid ingredients separately?
The answer is that it doesn't matter too much how the liquids are mixed with each other and how the dry ingredients are mixed with each other, but when the liquids and dry ingredients are mixed together, science happens.
The reasons to mix the dry ingredients in the food processor are 1. So the flour gets tossed around, which helps to make a light and fluffy baked good and 2. So the chemical leavening agent (the baking soda, baking powder, or both) gets distributed equally in the flour.
Next the liquid ingredients come together. Here's one of my ice cube egg yolks. I think this would work better if I had more forethought and let it defrost in the fridge during the day rather than delicately trying to defrost it in the microwave and not get scrambled eggs.
Here are the liquids together: You can see tiny bits of cooked egg yolk that had to be scooped out.
Then the liquids are poured into the dry ingredients and the two are brought together with a minimal amount of stirring. Why? Because stirring distributes air bubbles evenly throughout the baked good, making it softer and more tender. That's why you beat the heck out of the batter for a cake. It makes it nice and delicate and soft. Muffins, however, are not supposed to be too delicate. Doing just a little stirring causes irregular air bubbles, leading to a more course texture. Although most cookies are made using the creaming method, these are muffin method cookies.
Here's the batter together. It's not nice and smooth like the slice n' bakes.
In fact, the batter was very loose, and I had to ball it together with my hands. The result, however, was amazing. I got a lot of compliments on these cookies.
It will be interesting to see the differences between these and cookies I will make with the creaming method.
Next up in Getting an MS in Baking: Pineapple Upside Down Cake
Posted by
Chelsea
at
5:33 AM
Getting an MS in Baking- Chocolate Chip Cookie #10
2010-06-15T05:33:00-05:00
Chelsea
Baking|MS in Baking Project|
Comments
Labels:
Baking,
MS in Baking Project
Tuesday, June 8, 2010
Getting an MS in Baking- Old School Muffins
Until now I've been BS-ing my way through baking but no more! I'm taking on a challenge to really learn the science behind baked goods by baking my way through Alton Brown's I'm Just Here for More Food.
Then sift all the dry ingredients together. Brown recommends doing this in the food processor. I recommend making sure you know all the safety lock features on your food processor before you get to this part so you don't have to pause for 20 minutes while your frustrated husband tries to figure out why the darn thing isn't working.
Then mix together the wet ingredients.
Add bits and pieces to the dry (I chose cinnamon, raisins and walnuts).
And the wet goes into the dry until just incorporated (lumps = okay).
Dish into muffin tins and bake.
Here's how the first batch turned out:
And for the real test, did the crumb of my muffins look like muffin (on the left) vs. cupcake (on the right)?
Answer: I have no idea! You be the judge:
The book takes you through the 6 major baking methods, roughly from easiest to the most difficult. This week I started with the first recipe in the muffin method section, titled appropriately: Old School Muffins (recipe from a non-Alton site).
Honestly, the recipe is one of the least important parts of the project. The goal is not just to dump some stuff together and call it baking. The goal is to do things right.
First you have to weigh your dry ingredients- at least the flour.
Then sift all the dry ingredients together. Brown recommends doing this in the food processor. I recommend making sure you know all the safety lock features on your food processor before you get to this part so you don't have to pause for 20 minutes while your frustrated husband tries to figure out why the darn thing isn't working.
Then mix together the wet ingredients.
Add bits and pieces to the dry (I chose cinnamon, raisins and walnuts).
And the wet goes into the dry until just incorporated (lumps = okay).
Dish into muffin tins and bake.
Here's how the first batch turned out:
And for the real test, did the crumb of my muffins look like muffin (on the left) vs. cupcake (on the right)?
Answer: I have no idea! You be the judge:
Daniel said he thought they were very muffin-like and not cupcake like, but he knows enough to flatter me when it comes to baking.
What did I think? I thought the recipe was very quick and easy even with the added weighing and processing. I loved dumping the wet into the dry because it kept the mixer from getting sticky, making clean-up quicker. Not sure that the next recipe will be, but I felt successful with this one, and I'm ready for a new challenge.
Posted by
Chelsea
at
5:04 AM
Getting an MS in Baking- Old School Muffins
2010-06-08T05:04:00-05:00
Chelsea
Baking|MS in Baking Project|
Comments
Labels:
Baking,
MS in Baking Project
Subscribe to:
Posts (Atom)